

Introduction
Have you ever wondered what happens behind the scenes when a camera lens, telescope, or precision optical adapter is manufactured? The journey from a simple design concept to a finished product that performs flawlessly in your hands is a fascinating blend of cutting-edge technology, precision engineering, and meticulous quality control. Understanding this process not only reveals why optical components cost what they do—it also explains why certain manufacturers deliver superior quality.
Leedsen specializes in bringing this complex process to life every single day. As a professional lens manufacturer with expertise in camera lenses, lens adapters, telescopes, and custom hardware, we’ve refined our manufacturing process to deliver optical excellence at every stage. Our commitment to precision is evident in each product that leaves our facility, whether it’s a standard camera lens or a bespoke optical system designed for specialized applications.
This comprehensive guide takes you through the complete manufacturing journey—from the initial design phase through final shipment—revealing the critical steps, quality checkpoints, and technological innovations that define modern lens manufacturing in 2025.
Phase 1: Design Specification and Optical Planning
Every exceptional lens begins with exceptional design. This phase establishes the foundation for everything that follows.
Defining Requirements
The design process starts with detailed conversations between Leedsen‘s engineering team and customers to establish precise requirements:
Optical specifications: Focal length, aperture (f-number), field of view, and magnification goals
Application context: Professional photography, scientific instrumentation, astrophysics, or industrial inspection?
Environmental demands: Temperature ranges, humidity exposure, dust contamination potential
Quality targets: What level of optical performance justifies the manufacturing investment?
Production volume: Are we manufacturing 10 units or 10,000 units? Volume determines optimal manufacturing methods
Budget parameters: Cost constraints guide material selection and manufacturing approach
Computer-Aided Optical Design
Modern optical design relies on sophisticated simulation software. Leedsen employs industry-standard tools like Zemax and SYNOPSYS to model how light travels through proposed lens designs under various conditions.[web:65] Engineers simulate optical performance across thousands of scenarios, evaluating:
Aberration profiles: Spherical aberration, coma, astigmatism, field curvature, distortion, and chromatic aberration
Light transmission efficiency: Quantifying optical losses through reflections and absorption
Manufacturing tolerance impact: How will real-world manufacturing variations affect actual performance?
Thermal behavior: Will the lens maintain focus across temperature extremes?
Mechanical stress: Will assembly processes introduce stresses that compromise optical quality?
Tolerancing and Manufacturability
A lens design that looks perfect in simulation but cannot be economically manufactured is ultimately worthless. This is why Leedsen invests significant effort in “tolerancing”—determining acceptable manufacturing variation ranges.
For a multi-element lens system, engineers must specify tolerances for:
Radius of curvature on each optical surface (typically ±0.001 inches or tighter)
Element thickness (variations as small as ±0.01 mm matter)
Spacing between elements (air gaps must be precise to fractions of millimeters)
Centering precision (optical axis alignment within micrometers)
Material refractive index variations (optical glass properties fluctuate slightly between batches)
This tolerancing phase often requires multiple design iterations. The goal: balance theoretical optical perfection with practical manufacturability—and ultimately, cost-effectiveness.
Final Design Documentation
Once the design passes all simulations and tolerancing analysis, Leedsen’s engineers generate comprehensive technical drawings and bills of materials specifying:
Optical glass type for each element (BK7, SF5, fused silica, or specialty materials)
Precise surface geometry and optical coatings required
Mechanical component specifications
Assembly procedures and alignment requirements
Quality inspection criteria
These documents guide every subsequent manufacturing step.
Phase 2: Raw Material Sourcing and Preparation
The foundation of optical excellence is premium raw material. Leedsen partners with the world’s leading optical glass suppliers—Schott, Hoya, and Corning—to source materials meeting strict specifications.
Optical Glass Selection Criteria
Different lens applications demand different glass formulations. The choice affects performance, cost, and manufacturability:
BK7 Borosilicate Crown Glass: The most versatile general-purpose optical glass, ideal for camera lenses and standard applications. Excellent optical properties with good chemical durability.
SF5 Dense Flint Glass: Higher dispersion characteristics make it ideal for correcting chromatic aberrations in telephoto and zoom lenses.
Fused Silica: Superior UV transmission and exceptional thermal stability for precision scientific instruments and speciality telescopes.
Specialty Materials: Custom glasses for infrared, ultraviolet, or extreme-temperature applications
Quality Verification at Receiving
When optical glass arrives at Leedsen’s facility, we perform rigorous receiving inspections:
Refractive index verification: Confirming the glass matches specified optical properties within tolerances
Dispersion testing: Validating how the material separates light wavelengths
Impurity detection: Even parts-per-million contamination can scatter light and degrade image quality
Dimensional checking: Verifying blank sizes and shapes meet specifications
This quality gate prevents downstream problems—inferior material discovered early saves time and cost compared to discovering defects after extensive manufacturing work.
Preforming and Rough Shaping
Optical glass arrives as “blanks”—roughly shaped pieces approximately 10-15% oversized from final dimensions. Leedsen’s team uses precision grinding to shape these blanks into preforms optimized for the next manufacturing stage. This intermediate step:
Removes any damaged glass from edges or surfaces
Creates approximately correct curvature and thickness
Prepares the material for precision manufacturing
Ensures adequate material remains for subsequent grinding operations
Phase 3: Precision Lens Element Manufacturing
This is where raw glass becomes precision optical components. The method chosen depends on geometry complexity, required precision, and production volume.
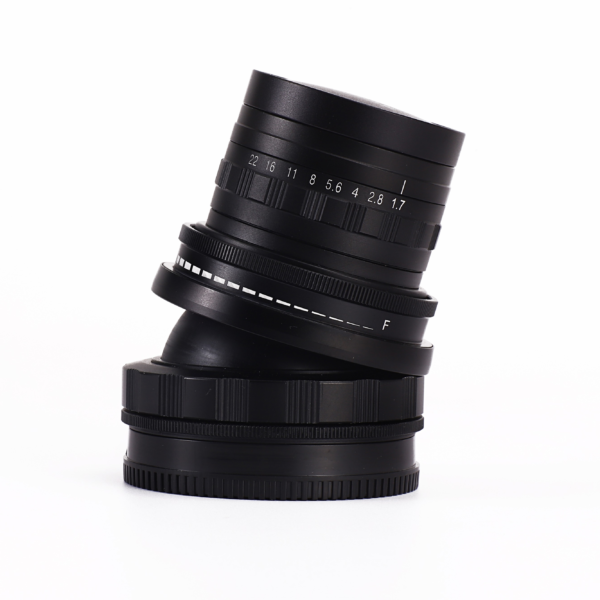
Method 1: Grinding and Polishing (Standard Optics)
For most camera lenses and custom optical work, grinding and polishing remains the gold standard.
Coarse Grinding: The glass blank is mounted on a precision grinding machine where progressively finer abrasives shape the lens surface. Starting with coarser grits (80-120 grit), material is rapidly removed, establishing approximate surface curvature.
Fine Grinding: Medium-grit abrasives (180-320 grit) refine the surface, moving incrementally closer to final specifications. At this stage, the surface transitions from rough to smoother with visible contours.
Polishing: This is where grinding transitions to polishing using specialized pitch pads and cerium oxide or tin oxide compounds. Skilled technicians carefully guide the lens as the polishing process removes microscopic scratches and surface irregularities. A single lens element can require 4-8 hours of polishing to achieve professional optical quality.[web:69]
Centering and Edging: Once polishing is complete, the lens is mounted on a centering machine where material is carefully ground away to achieve precise centering—positioning the optical center within micrometer tolerances relative to the lens edges. This ensures the lens will mount properly and perform predictably.
Method 2: Molded Glass Lenses (High-Volume Production)
For mass production—particularly smartphone camera lenses and standard camera optics—glass molding offers significant cost advantages.[web:3]
The molding process:
Preform Creation: A glass preform (approximately final size) is prepared through grinding or pressing
Heat Compression: The preform is heated to softening point and placed between precision mold cavity surfaces
Controlled Pressure Application: Molds are pressed together with precise force while temperature is carefully controlled
Cooling: The mold is gradually cooled, allowing glass to solidify in the mold cavity
Demolding: Once cooled, the molded lens is carefully removed
Advantages: Dramatically lower per-unit cost at volumes exceeding 10,000 units; consistent shape across production batches
Disadvantages: Significant upfront mold investment ($5,000-50,000 depending on complexity); economical only at high volumes
Method 3: Precision CNC Diamond Turning (Premium Custom Work)
For the highest precision requirements and complex aspheric geometries, Leedsen employs CNC diamond turning—the most advanced manufacturing method.[web:65]
The diamond turning process:
Machine Setup: A diamond-tipped stylus is positioned on a precision CNC machine with sub-micrometer positional accuracy
Material Removal: The diamond tool traces precisely programmed surface contours, removing material in a single pass
Surface Quality: The single-pass removal with a sharp diamond tool creates finished surfaces often requiring minimal or no polishing
Advantages: Exceptional optical quality; ability to create complex aspheric and freeform geometries impossible with other methods; ideal for one-of-a-kind and limited-production specialized optics
Disadvantages: Expensive equipment ($200,000+); slow production rates; not economical for high volumes; limited to specific materials
Method 4: Injection Molding (Plastic Optics)
Optical-grade plastics like polycarbonate and acrylic offer unique advantages for specific applications.[web:3]
Injection molding process:
Material Heating: Plastic resin is melted to flowable consistency
High-Pressure Injection: Liquid plastic is injected into precision mold cavities under high pressure
Cooling and Ejection: Once cooled, the finished lens is ejected from the mold. Cycle times can be under 60 seconds
Advantages: Lowest per-unit cost; fastest production cycles; suitable for complex geometries including aspheric surfaces; lightweight
Disadvantages: Lower optical quality compared to glass; temperature sensitivity; scratching susceptibility; environmental sensitivity
Phase 4: Optical Coating Application
Optical-grade plastics like polycarbonate and acrylic offer unique advantages for specific applications.[web:3]
Injection molding process:
Material Heating: Plastic resin is melted to flowable consistency
High-Pressure Injection: Liquid plastic is injected into precision mold cavities under high pressure
Cooling and Ejection: Once cooled, the finished lens is ejected from the mold. Cycle times can be under 60 seconds
Advantages: Lowest per-unit cost; fastest production cycles; suitable for complex geometries including aspheric surfaces; lightweight
Disadvantages: Lower optical quality compared to glass; temperature sensitivity; scratching susceptibility; environmental sensitivity
Phase 5: Deep Cleaning and Surface Preparation
Before assembly, lens elements undergo rigorous multi-stage cleaning to remove all manufacturing residues.
Contamination sources include:
Grinding residue (fine glass particles)
Polishing compound residue (cerium oxide, tin oxide particles)
Dust from the manufacturing environment
Fingerprints and hand oils (even brief contact transfers oils to surfaces)
Water spotting or mineral deposits
The Cleaning Process
Stage 1: Solvent Immersion
Lenses are immersed in precision-grade solvents (typically isopropyl alcohol or specialized optical cleaners) to dissolve organic residues and oils. Immersion time varies from 15-30 minutes depending on contamination severity.
Stage 2: Ultrasonic Agitation
Ultrasonic energy creates microscopic cavitation bubbles that aggressively dislodge particles from lens surfaces. This stage is remarkably effective at removing stubborn polishing compound residue.
Stage 3: Rinse and Dry
Lenses are rinsed in clean solvents and dried using controlled compressed air or centrifugal methods to prevent water spotting—the optical equivalent of leaving tap water to dry, leaving mineral deposits.
Stage 4: Final Inspection
Under intense lighting and magnification, any remaining contamination is identified. If additional cleaning is needed, targeted approaches address specific contaminants.
This cleaning step is absolutely critical. Residual contamination can create stress points during assembly or scatter light, reducing transmission and image quality. For high-precision optical systems, contamination as tiny as 1-micron particles can create measurable optical aberrations.
Phase 6: Rigorous Quality Control and Optical Testing
Quality control determines whether a lens meets specifications before reaching customers. Leedsen implements multiple quality checkpoints throughout the manufacturing process.
In-Process Quality Checks
At each manufacturing stage, lenses undergo verification:
After grinding: Surface radii and dimensions checked against specifications
After polishing: Surface smoothness verified; scratches and digs measured and categorized
After coating: Light transmission tested across wavelengths; coating thickness verified
After centering: Element centering and positioning verified to micrometers
After cleaning: Surface cleanliness confirmed under magnification
Final Optical Performance Testing
Interferometer Testing: The most precise optical measurement method. Interferometers measure actual lens surface shape by analyzing light reflection patterns. Deviations from designed surfaces appear as interference fringe patterns—precisely revealing surface errors down to 10 nanometers (visible light wavelength is approximately 500 nanometers).
MTF (Modulation Transfer Function) Testing: MTF measures how effectively a lens transfers contrast at different spatial frequencies—essentially measuring image sharpness and detail resolution. High-quality lenses maintain strong MTF across the field of view at multiple apertures.
Focal Length Verification: Using precision optical benches with collimators, actual focal length is measured and compared against specifications.
Transmission Measurement: Spectrophotometers measure light transmission across the visible spectrum and nearby wavelengths, verifying coating effectiveness.
Visual Inspection: Surface defects (scratches, digs, dust inclusions, coating defects) are inspected under magnification and classified per ISO 10110-7 standards.
Advanced Automated Inspection
Modern manufacturers increasingly employ automated surface quality inspection using high-resolution cameras and AI-powered analysis. These systems detect defects with micrometer precision—faster and more consistently than human inspection.[web:70] Machine learning algorithms identify defect patterns and flag components requiring rework or scrap, maintaining consistent quality standards across production batches.
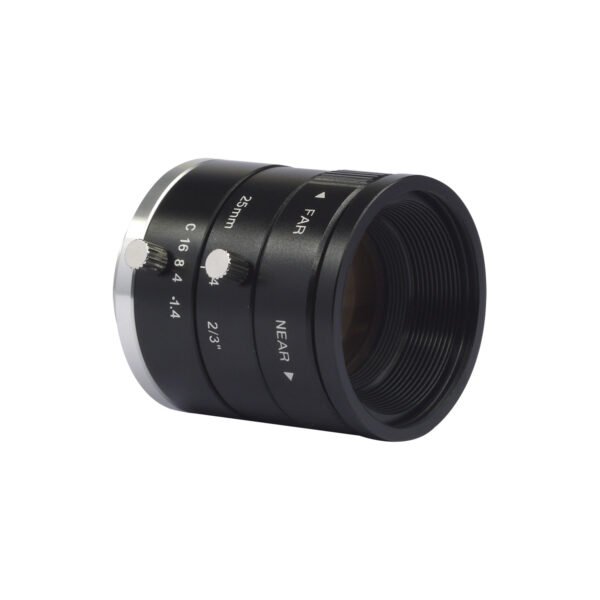
Phase 7: Mechanical Component Manufacturing and Assembly
While optical elements are manufactured and tested, mechanical components (barrels, focus rings, mount adapters, spacers) are manufactured in parallel using CNC machining, injection molding, or precision stamping.
Precision CNC Machining
Metal components require exact manufacturing to ensure proper fit and alignment with optical elements. Leedsen maintains tight controls on:
Mounting surface accuracy: Where optical elements seat must be precise to prevent optical misalignment
Thread specifications: Focus mechanisms and mount adapters require precision threads
Surface finish: Internal surfaces must be smooth to prevent stray light and reflections
Material selection: Brass, aluminum, or stainless steel chosen based on environmental requirements and cost
Automated Assembly with Vision Guidance
For mass production, Leedsen employs automated assembly systems that position optical elements and mechanical components with robotic precision and vision-guided verification. Even minor positioning errors—fractions of a millimeter—can degrade optical performance. Automated systems track component positioning in real-time and adjust placement to ensure perfect concentricity and axial alignment.
Assembly Quality Checkpoints
As the lens progresses through assembly:
Vision verification: Cameras confirm each element is properly centered and positioned
Spacing validation: Air gaps between elements are verified to specification
Mechanical function testing: Focus rings, zoom mechanisms, and adapters tested for smooth operation
Electrical verification: For electronic lenses, autofocus and aperture systems are tested
Phase 8: Final Performance Testing and Calibration
This is where raw glass becomes precision optical components. The method chosen depends on geometry complexity, required precision, and production volume.
Autofocus Calibration
For electronic lenses, the autofocus system must be precisely calibrated. The lens is placed on an optical bench where targets at different distances are imaged. Autofocus response is monitored and calibrated to ensure accurate focus throughout the entire focus range.
Image Stabilization Testing
If the lens includes image stabilization, gyroscopic sensors are tested and calibrated. Performance is verified against specifications for stabilization effectiveness across different motion scenarios.
Full Optical Performance Validation
Final testing confirms the completely assembled lens meets all specifications:
Full-field MTF testing: The lens is tested across the entire field of view at multiple apertures
Distortion measurement: Geometric accuracy (barrel distortion, pincushion distortion) is verified
Vignetting measurement: Corner brightness is measured to detect edge darkening
Chromatic aberration evaluation: Color fringing is assessed and quantified
Real-world image capture: Actual photographs are captured and evaluated for sharpness, contrast, and color accuracy
Environmental Durability Testing
For professional-grade lenses, additional environmental testing validates durability:
Temperature cycling: Lenses are cycled through extreme temperature ranges (-10°C to +50°C) to ensure focus stability
Humidity exposure: Salt-spray or high-humidity conditions test coating durability
Dust and water resistance: If specified, environmental sealing integrity is validated
Impact resistance: Vibration testing or drop tests validate mechanical durability
Phase 9: Production Scaling and Mass Manufacturing
Once a design has been perfected through prototype testing and initial production runs, Leedsen scales manufacturing to full production volumes.
Process Optimization and Automation Expansion
The fundamental manufacturing processes remain consistent, but production efficiency receives intense focus:
Automated systems expansion: Labor-intensive manual processes transition to robotic and CNC automated alternatives
Batch optimization: Multiple identical lenses are processed simultaneously when possible
Throughput optimization: Manufacturing steps are streamlined to reduce cycle time without sacrificing quality
Yield improvement: Statistical process control tracks defect rates and identifies opportunities for continuous improvement
Statistical Process Control
Leedsen implements rigorous statistical monitoring throughout high-volume production:
Measurement data collection: Key parameters are measured on every component or representative statistical samples
Trend analysis: Data is analyzed to identify gradual process drift before specifications are violated
Preventive action protocols: When trends indicate potential problems, corrective actions are taken proactively
Continuous improvement: Regular data reviews identify optimization opportunities
Supplier Quality Management
For components sourced from external suppliers (specialized coatings, electronic components, fasteners), Leedsen maintains ongoing quality oversight:
Supplier qualification and audits: Suppliers are evaluated for process capability and consistency
Receiving inspections: Supplied components are verified before integration
Performance feedback: Quality data is shared with suppliers to drive mutual improvement
Phase 10: Final Packaging, Testing, and Shipment
As lenses reach completion, quality preservation and careful packaging ensure products arrive in perfect condition.
Final Quality Verification Before Packaging
Before packaging, each lens undergoes:
Mechanical function testing: All mechanisms operate smoothly through their full range
Visual inspection: Final check for packaging damage or defects
Cleaning verification: Surfaces are confirmed free of dust or contamination
Documentation review: Serial numbers, calibration data, and test results are verified
Protective Packaging
Lenses are packaged meticulously to prevent shipping damage:
Padded cases or boxes: Cushioning materials protect against impact
Moisture control: Silica gel desiccant packets prevent humidity accumulation
Documentation inclusion: Warranty information, cleaning instructions, and technical specifications are included
Original packaging retention: Premium lenses retain original packaging for professional appearance and resale value
Traceability and Records
Leedsen maintains comprehensive records for every lens manufactured:
Serial numbers: Each lens receives a unique identifier enabling tracking throughout its lifespan
Manufacturing lot documentation: Records indicate when and where each lens was produced
Test data archives: Actual measurement results and optical performance data are permanently documented
Equipment calibration records: Verification that all measuring instruments were properly calibrated during testing
This traceability enables rapid identification and resolution of any issues that arise after customer purchase—and provides confidence in product quality.
FAQ: Essential Questions About Lens Manufacturing
Q: Why do some lenses cost significantly more than others with similar focal lengths?
A: Manufacturing complexity varies dramatically. A simple single-element lens might cost $15 to manufacture, while a 15-element professional telephoto lens might cost $500+. Professional-grade lenses include premium optical glass, multi-layer anti-reflective coatings, precision autofocus systems, environmental sealing, extensive testing, and quality assurance—all adding cost but delivering superior performance and durability.
Q: How important is where a lens is manufactured?
A: Manufacturing location matters less than manufacturing capability and quality systems. The world’s highest-quality lenses are manufactured in Japan, Germany, and South Korea—but excellent optical components also come from manufacturers in China, India, and Poland. What matters is whether the manufacturer implements rigorous quality control and uses premium materials consistently.
Q: Can custom lenses be manufactured affordably for small quantities?
A: Yes, with the right approach. Custom designs with molded elements become economical at volumes exceeding 5,000 units. Smaller quantities (100-1,000 units) use grinding and polishing methods—more expensive per-unit but involving no tooling investment. For prototypes (1-10 units), diamond turning offers the best balance of quality and cost.
Q: What’s the difference between single-coated and multi-coated lenses?
A: Single-coated lenses use one anti-reflective coating layer, reducing reflection to approximately 1-2% per surface. Multi-coated lenses use 4-8 layers optimized across different wavelengths, achieving 0.3-0.5% reflection per surface. Multi-coated lenses transmit significantly more light (98-99% vs 95-96%) and are preferred for professional applications where maximum light transmission and contrast matter.
Q: How long does custom lens manufacturing typically take?
A: Timelines vary significantly. Prototype quantities using diamond turning: 4-8 weeks. Small production runs (grinding/polishing): 8-12 weeks. Large volumes (molded): 12-16 weeks. The longest delays typically occur during design optimization (2-4 weeks) and initial optical element manufacturing or precision tooling creation (6-10 weeks).
Q: What are the most common lens manufacturing defects?
A: Common defects include scratches (polishing damage), digs or pits (material loss), surface deformation (inadequate glass annealing), coating defects (coating process variations), and centering errors (assembly misalignment). Advanced manufacturers like Leedsen minimize defects through careful process control and automated inspection—though zero-defect production remains impossible at scale.
Q: Why do some electronic lens adapters fail with autofocus?
A: Electronic lens adapters maintain autofocus by communicating with camera bodies and controlling focus motors. However, adapter electronic quality and firmware accuracy matter significantly—poorly designed adapters may introduce focus errors or incompatibility issues. Mechanical adapters without electronics don’t support autofocus at all—they provide only manual focus capability.
Q: How do manufacturers ensure consistency across production batches?
A: Statistical process control, equipment calibration verification, material batch traceability, and continuous operator training all contribute. Automated systems reduce human variability. Rigorous optical testing catches defects before shipment, ensuring consistent quality across all production batches.
Q: What happens when lenses fail quality testing?
A: Components are typically segregated as “seconds” or candidates for rework. Rework might involve re-polishing, re-coating, or replacement of specific elements. If defects cannot be economically corrected, components are scrapped. Manufacturers track scrap rates as key quality metrics—higher scrap rates indicate process problems requiring investigation and corrective action.
Q: Can lens performance be improved by replacing only the optical elements?
A: Partially. Replacing optical elements improves optical performance somewhat, but mechanical issues (stiff focus ring mechanisms, damaged aperture blades) cannot be resolved by element replacement alone. For significant performance improvements, typically a complete lens system upgrade is required.