

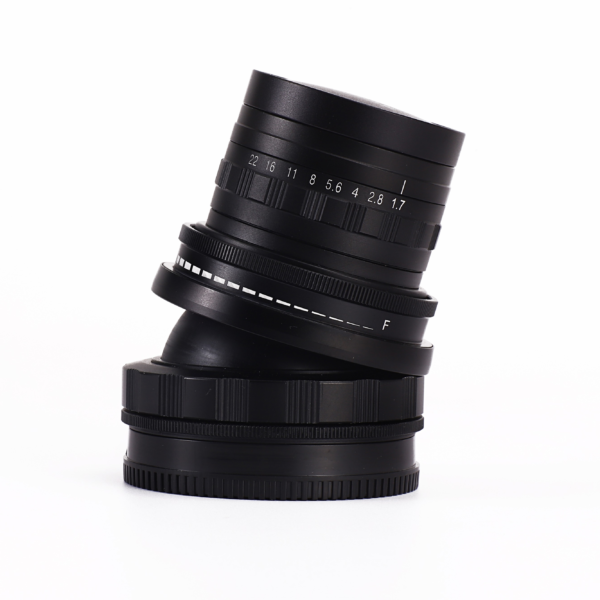
Camera lenses are engineering marvels, often costing more than the camera body itself. They consist of numerous glass components, intricately designed mechanical structures, and advanced chemical coatings.
This precision optical instrument is designed to minimize glare and maximize recovery. However, it always faces one enemy: the environment. Cosmetics, pollen, oily fingerprints, and moisture are unavoidable during any shooting process.
Cleaning your lens with the right microfiber cloth is more than just a cleaning technique; it’s an essential maintenance measure that directly impacts image quality. Dirty lenses blur images, create flare around light sources, and negatively affect overall recovery.
Wiping lens coatings is simple, but improper methods can cause permanent damage. Modern lens coatings, while robust, are not indestructible. This guide provides professional lens cleaning steps to ensure your lenses always remain clean and new, avoiding scratches or coating abrasion.
Why Microfiber is the Industry Standard
Before delving into this method, it’s essential to understand why microfiber cloth is the only material recommended for direct contact with optical glass.
Microfiber is a synthetic material, typically a mixture of polyester fibers and polyester (polyamide). Unlike cotton fibers, which are naturally round fibers that are easily reassembled and pushed around, microfiber is made from split fibers. These fibers are tiny—typically only one-hundredth the diameter of a human hair.
This split-fiber structure offers two distinct advantages in photographic equipment:
Absorbent fibers: These fibers act like millions of tiny hooks or spoons, absorbing dirt and oil from surfaces and locking them into the fabric’s weave. Cotton, in contrast, easily smears oil onto surfaces.
Absorbency: Microfiber can absorb up to seven times its own weight in liquid, allowing it to absorb oily stains (such as fingerprints) even with highly effective, harsh chemicals.
However, not all microfibers are created equal. For camera lenses, optical microfiber must be used. This fiber undergoes a special tearing process, preventing lint and scratching the lens. Fabric cloths used for cleaning kitchen countertops or car dashboards are often too rough, attracting larger debris and potentially scratching the lens.
The Golden Rule: Check Before You Clean
A common mistake beginners make is immediately wiping any dirt or grime on the lens. This is the fastest way to damage a lens.
If you wipe a dry, smudged lens with a microfiber cloth, you’re dragging these tiny particles across the lens surface. The cloth presses these particles into the coating, creating “cleaning marks” or warning scratches.
Therefore, the cleaning process must always follow a specific order: remove loose debris first, then wipe.
Essential Tools for Safe Cleaning
A microfiber cloth is key to effectively cleaning lenses, but other tools are also needed. A complete cleaning kit should include:
Optical-grade microfiber cloth: Best kept in a sealed plastic bag to prevent buildup.
Air blower (rocket blower): A handheld rubber bulb that sprays a stream of air.
Soft-bristled brush: Usually made of goat hair or synthetic fibers, commonly found on “lens pens”.
Lens cleaning fluid: An alcohol-free solution specifically designed for multi-layered optical components.
Detailed Step-by-Step Guide: How to Clean Your Lens with a Microfiber Cloth
Following this procedure ensures the safest cleaning results. This method is adapted from the procedures used by service centers and professional rental companies.
Step 1: Gravity-Assisted Inlet
Before touching the lens with any object, blow it with air. Hold the camera with the lens facing down. Squeeze out the air forcefully, blowing air over the front of the lens.
Invert the lens, using gravity to float heavier particles away from the glass surface instead of re-depositing them. This step can create a dangerous sandstorm that can cause scratches.
Caution: Do not use compressed air canisters. The powerful propulsion in these canisters can sometimes spray out cold liquid, which may damage the lens coating or blow a particle into the lens cartridge.
Step 2: Soft-Bristle Brush Technique
If blowing air is insufficient to remove all loose dust (sometimes pollen can stick to the lens), use a soft-bristled lens brush. Gently sweep across the lens surface. Do not press down; let the tips of the bristles work. This is the second line of defense to ensure no hard particles remain on the lens.
Step 3: Inspect the Surface
Til the lens under strong light. If the surface is free of dust and grit, but you can still see stains, fingerprints, or dried watermarks, it’s time to wipe it with a microfiber cloth.
Step 4: Dry Wiping
For minor stains, wiping with a dry cloth is usually sufficient.
Fold the Cloth: Never crumple the cloth into a ball. Fold it into a flat square or triangle. This provides cushioning for your fingers and ensures even pressure distribution.
Wipe from Center to Edge: Place the cloth in the center of the lens. Using very gentle pressure, move the cloth in a circular, spiral motion towards the edge of the lens.
Why Wipe in Circular Strokes? Circular wiping pushes residual dirt towards the lens edges, away from the optical center, which is crucial for sharpness. Furthermore, circular cleaning marks (if they appear) are less damaging to optical performance than straight scratches.
Step 5: Wet Wipes (for Stubborn Stains)
If wiping with a dry cloth fails to remove oil stains or salt spray, you’ll need to dampen the cloth with water. Important Warning: Never spray lens cleaning solution directly onto the lens. The liquid may run to the lens edge, seep under the retaining ring, and enter the lens assembly. This can cause mold growth, fogging, or electrical malfunctions in lenses with built-in motors.
Correct Application Method:
Place one or two drops of lens cleaning solution on a corner of a microfiber cloth, not on the lens itself.
Use the damp side of the cloth to wipe the lens in the circular motion described above.
Immediately switch to the dry side of the cloth and wipe the surface dry to prevent streaks.
Common Contaminants and Their Removal Methods
Different environments produce different types of contaminants. Please adjust your cleaning strategy accordingly.
Seawater Splash: This is dangerous. Salt crystals are sharp and corrosive. If the lens is splashed with seawater, never wipe it after it dries. Salt crystals can scratch the coating. First, dissolve the salt crystals with a slightly damp cloth (soaked in lens cleaning solution), then gently wipe them away.
Sand: If sand gets into the lens, primarily use a blower. Do not use a wiping cloth until you are absolutely certain that all sand particles have been removed.
Oily fingerprints: These fingerprints are acidic and will corrode the coating over time. Wipe them clean with a microfiber cloth as soon as possible.
What not to use
To keep your lens clean, people often develop some bad habits. Here are some items that should absolutely not come into contact with your camera lens:
Face tissues: These tissues are made from wood pulp, have a rough texture, and leave lint.
T-shirts/clothing: Clothing can absorb sweat, body oils, and abrasive dust from the environment. Wiping the lens with clothing will only worsen the dirt, not remove it.
Paper towels: These are highly abrasive and chemically treated.
Household glass cleaners (such as Windex): These cleaners often contain ammonia, which can damage the delicate anti-reflective coating (fluorine or nano-coating) on modern lenses. Always use a cleaner specifically designed for camera lenses.
Microfiber cloth care
While microfiber cloths are reusable, they do not have a self-cleaning function. Over time, the cloth absorbs grease wiped from the lens. A dirty cloth will then re-smear the grease onto the lens, causing it to become blurry and unpleasant.
Furthermore, if the cloth falls on the floor, it will act like a magnet, attracting dust and sand. If a microfiber cloth has been on the floor, it should not be used to wipe the lens until it is clean.
How to clean a microfiber cloth:
To maintain the integrity of the fibers, follow these cleaning instructions:
Hand wash or gentle machine wash: Use warm water.
Use liquid detergent only: Use a small amount of general liquid detergent.
Do not use fabric softener: This is crucial. Fabric softener works by forming a waxy residue on the fiber surface, making it feel soft. If the microfiber surface is covered with wax, it will lose its ability to absorb oil and leave oil stains on the lens.
Do not use bleach: Bleach will damage synthetic fibers.
Air dry: The high temperatures of a dryer may melt or damage the fibers. Hang the garment in a dust-free place to dry.
After drying, store the cloth in a clean compartment inside a dedicated plastic bag or camera bag. Do not leave it lying around to avoid lint buildup.
The Role of UV Filters
Many photographers like to always wear a clear UV filter or protective filter on their lenses. The reason is simple: replacing a $50 scratch filter is much cheaper than replacing a $2,000 scratch lens element.
Cleaning filters is exactly the same as cleaning lenses: the same method used to clean camera lenses applies to filters. However, because filters are flat (unlike curved lenses), they are generally easier to clean and less prone to dust accumulation in corners.
When to Stop Cleaning
Over-cleaning is also possible. Every time you touch the lens, there is a risk of minor scratches.
It’s important to note that tiny bright spots on the front lens element are imperceptible in photographs. Optical principles dictate that the focal length range is much larger than the front lens element. The brightness on the front lens element usually only slightly reduces tactile sensitivity in strong backlighting.
Therefore, it’s not necessary to pursue a perfectly flawless surface every day. Cleaning is only necessary when there are stains on the lens (stains have a greater impact on image quality) or when they are severely accumulated.
Conclusion
Mastering the technique of cleaning lenses with a microfiber cloth is key to patience and following the proper steps. This requires a shift in mindset from “wiping a window” to “maintaining a precision instrument.”
By prioritizing the use of air to blow away loose particles on the lens, using a clean optical microfiber cloth, and avoiding the use of harsh chemicals, photographers can ensure that their lenses maintain optimal performance over the long term. A clean lens allows the camera sensor to capture the real world—clearly contrasting and undisturbed. Using a microfiber cloth carefully and cleaning it regularly is ultimately the most valuable accessory in your camera bag.
Frequently Asked Questions (FAQ)
Q: Can I breathe on the lens instead of using cleaning fluid?
A: Breathing on the lens to create condensation is a common practice. Generally, occasional use is safe because the resulting moisture replenishes the lens. However, human breath may contain acidic substances and enzymes, and there is a risk of accidentally spraying saliva onto the lens. Using a dedicated lens cleaning fluid is always a safer and more hygienic option. Q: How often should I replace my microfiber cloth?
A: A high-quality microfiber cloth can last for many years if washed frequently. However, if the cloth starts to feel rough, or continues to shed even after washing, the fibers may have broken. In this case, the cloth should only be used to clean the lens mount or tripod legs, and you should purchase a new cloth specifically for cleaning lenses.
Q: Is it safe to clean the rear lens?
A: Yes, but be very careful. The rear lens (the lens closest to the sensor) usually has a greater impact on image quality than the front lens. Stains here are easier to remove from photos. The method is the same as for the front lens—first blow air, then gently wipe—but be very careful not to touch the electronic contacts or push anything into the sensor body.
Q: Why are there still oil stains on the rear lens after wiping?
A: This is usually because the microfiber cloth is very dirty and covered in oil, or too much cleaning solution was used. Please wash the cleaning cloth or replace it with a new one. If using cleaning solution, remember: the less you use, the better. A small amount of cleaning solution is enough to remove the grease, then wipe it clean immediately with a dry cloth.